Introduction
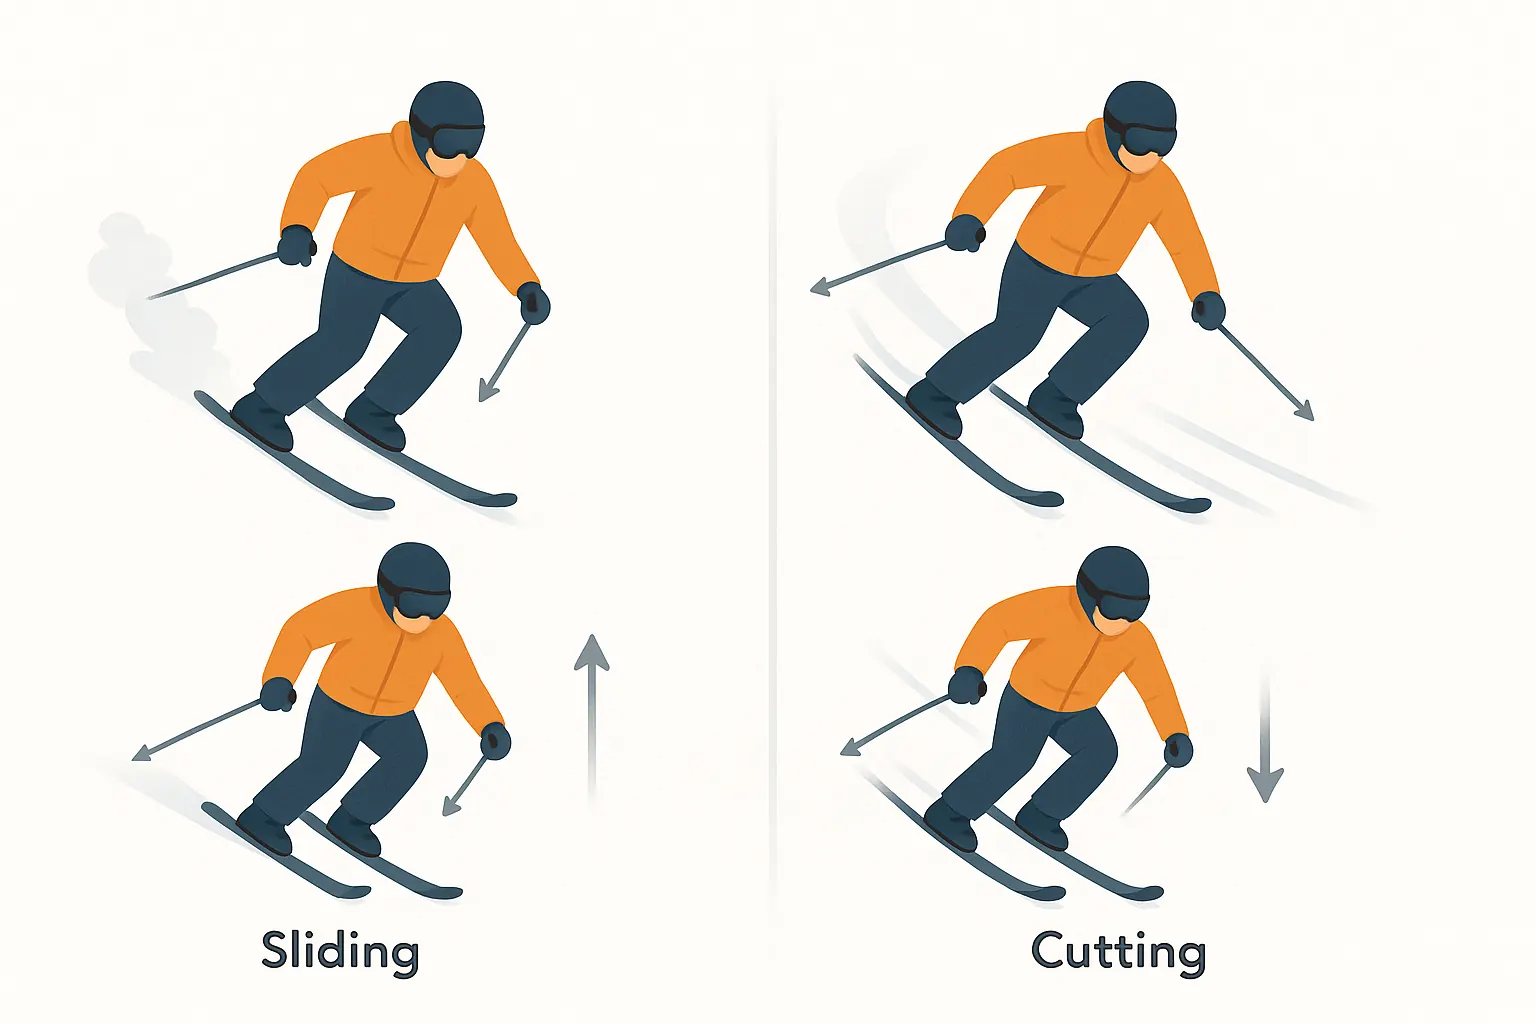
Sliding (brushed) uses lower edge angles and a controlled drift; cutting (carving) uses higher edge angles so the ski bends and leaves clean tracks. Learn to identify and apply both on purpose.
Steps
-
1) Side-slip & edge release
Practice a controlled side-slip: reduce edge angle until the skis slide; stop by increasing it. Feel the friction–edge relationship.
-
2) Brushed turn – speed control
Initiate with a small tail brush. Keep pressure even, eyes down the hill and steady rhythm. Track is smudged, speed stays manageable.
-
3) Railroad tracks – clean carve
On a gentle slope increase edge angle progressively, quiet torso, consistent pressure – leave two thin lines with no tail wash.
-
4) Blend – brushed in, carved out
Start with light brushing for control, then lock the edge in the second half for stronger grip. A practical bridge toward carving.
Typical Mistakes
- Cranking too much edge too early – ski hooks and pulls you inside.
- Back seat – poor pressure along the arc, tails wash out.
- Upper-body rotation into the turn – weak grip and balance.
- Practicing on steep/icy slopes – noisy feedback, low learning quality.
FAQ
Which slope?
Blue, uniform snow, good visibility. For “tracks” – very gentle pitch.
How to know I’m not sliding?
Look for two crisp thin lines behind your skis and a “rail-like” feel with no sideways smear.
Poles?
Great for rhythm cues; avoid leaning on them while carving.
Instructor’s Tip
“Don’t chase a pure carve at all costs. Let tempo and balance dictate edge angle – clean tracks are the consequence.”
Conclusion
Understanding sliding vs cutting lets you choose the right tool for terrain and goals. Move from controlled brushing to stable carving – the pathway to modern technique.