Introduction
DIN defines release force. Correct adjustment balances injury protection and retention. When in doubt, use a certified shop.
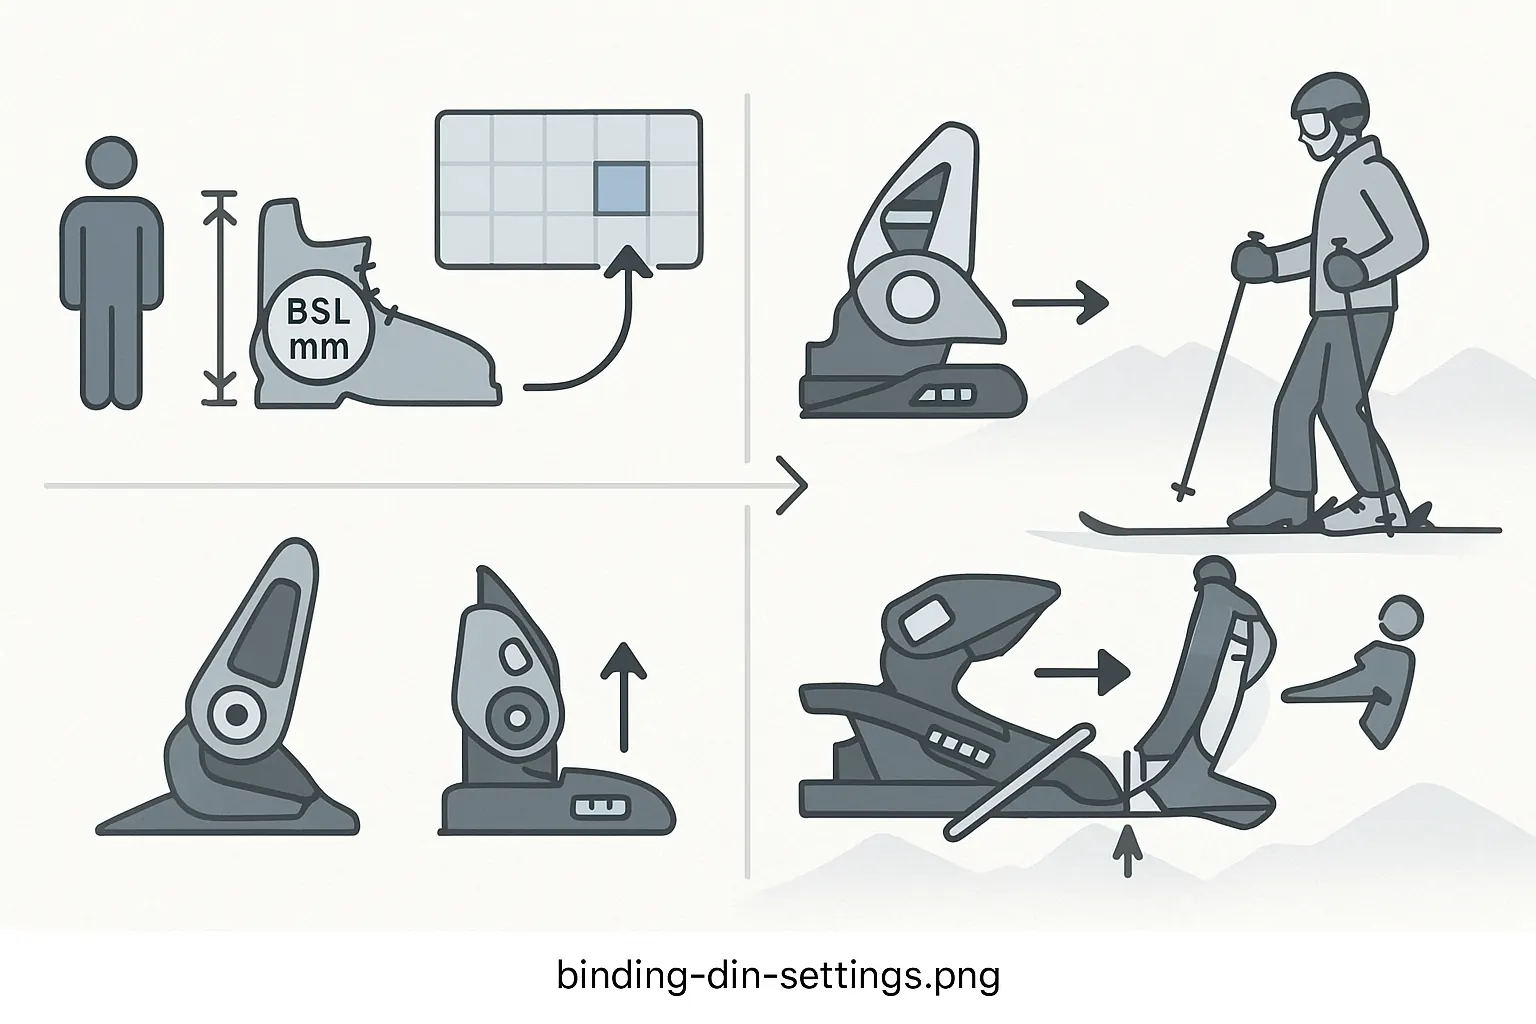
4-Step Adjustment
-
Collect inputs
Weight, height, Boot Sole Length (BSL in mm), age and style (cautious/aggressive). Read BSL on the boot shell.
-
Find DIN from chart
Start with weight/height zone, then adjust for BSL and skier type. Note the value for toe and heel.
-
Set toe & heel
Turn screws to target numbers on both units. Check forward pressure per binding manual.
-
Function test
Gently test lateral and forward release on flat terrain with support. If too easy/hard, don’t ski—recheck chart or visit a shop.
Typical mistakes
- “One DIN fits all” – ignoring BSL/style.
- Over-tightening to “avoid release” – higher knee injury risk.
- Not updating DIN after new boots or body changes.
- Skipping forward-pressure check.
Beginner questions
Where do I find BSL?
On the boot shell, usually heel/side, in millimeters (e.g., 306 mm).
Same DIN for toe and heel?
Usually yes, but some bindings specify nuance—follow the chart and the binding manual.
When should I change DIN?
When you change boots (different BSL), your weight, style or ability changes significantly.
Instructor’s tip
“A correct DIN is like a seatbelt—unnoticed until it matters.”
Conclusion
Proper DIN balances retention and release. If uncertain, get a certified shop to set and test it.