Introduction
Well-set bindings hold your boot firmly but release in a fall. Follow the basics below and always leave DIN setting to a technician.
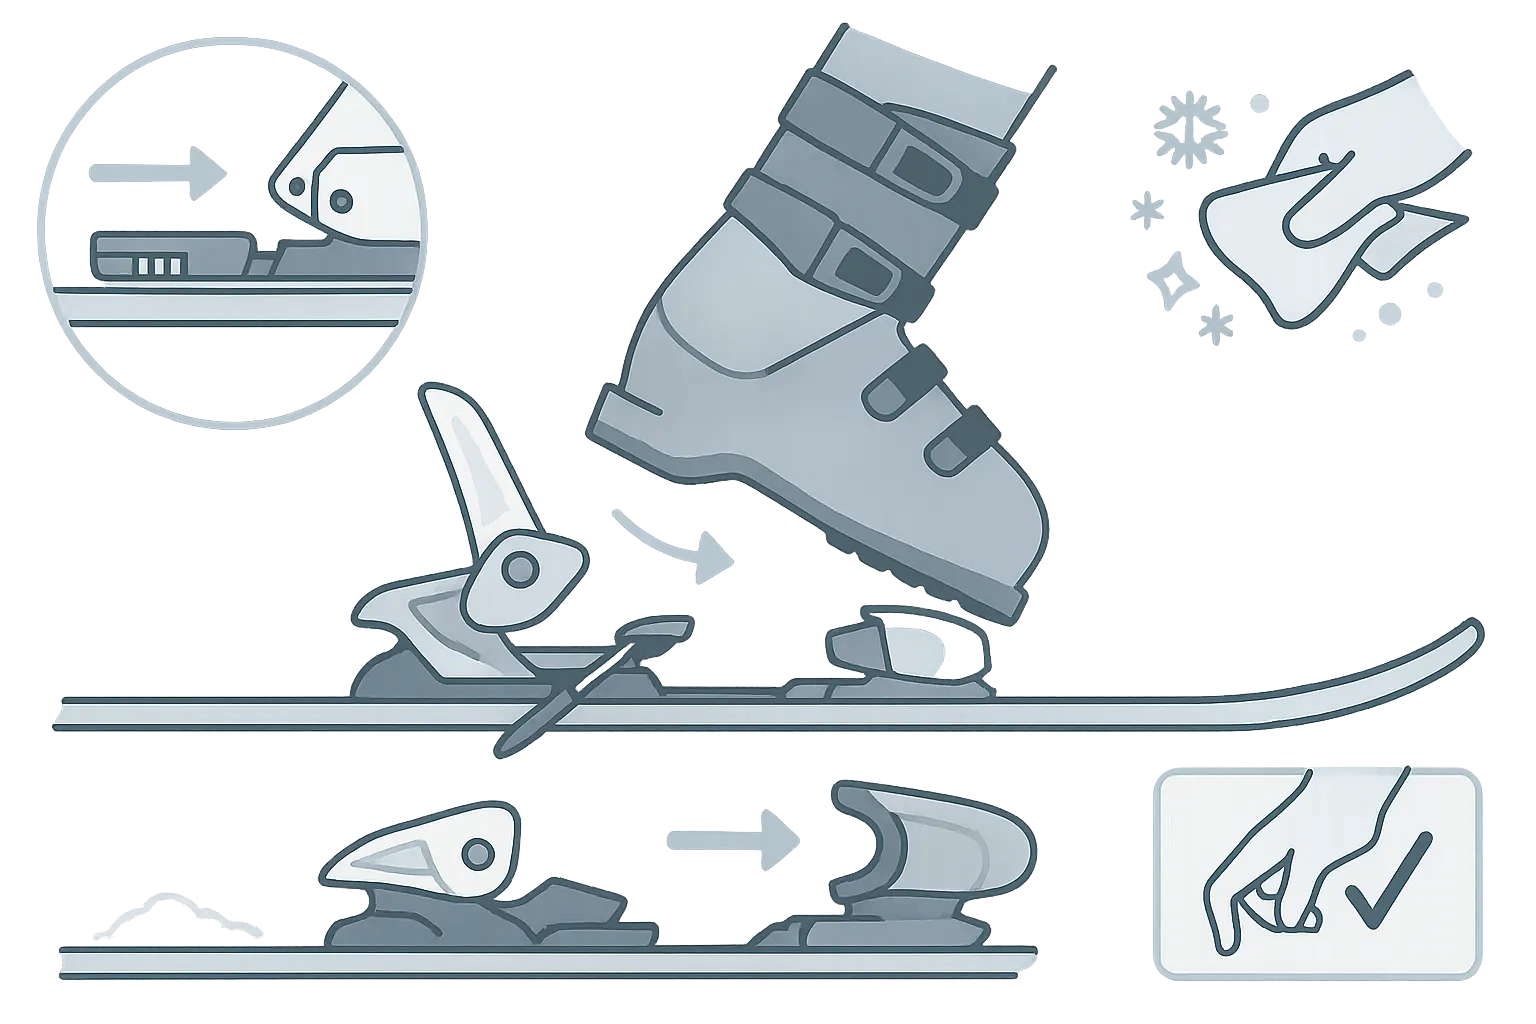
4 steps to a reliable click
-
Prep boot and binding
Clean boot sole and AFD plate from snow/ice. Check that brakes deploy freely.
-
Set length (on track systems)
On rental/track bindings slide the heel piece to your boot’s BSL (e.g., 305 mm). It should click and the boot seat without play.
-
Step in and lock correctly
Stand on flat snow. Feed toes into the toe piece first, then press the heel down until a clear click. Brakes should lift up.
-
Quick safety check
Gently tug the boot: there should be no vertical play. Beginners must not set DIN—have a shop perform a release test.
Typical mistakes
- Snow/ice on boot sole or AFD — causes poor locking.
- Heel first — misses the toe piece and can damage the mechanism.
- DIY DIN setting without a chart/technician — risk of injury.
Beginner questions
Where do I find my boot sole length (BSL)?
Stamped on the boot side or heel (e.g., BSL 305 mm). Use it to position track bindings roughly.
How firm should the click feel?
You should hear a clear click and the brakes lift. There should be no vertical play when you pull upward.
Can I set my DIN myself?
Not recommended. DIN depends on weight, height, style and sole length. Have a certified shop set and test it.
Instructor’s tip
“Before each day, wipe the soles and do two stomp-and-wiggle checks — better interface, fewer surprises.”
Conclusion
Clean interfaces, correct length and a proper step-in make for a dependable click. Leave DIN and measurement details to a technician.