Introduction
Correct pole handling makes rhythm and balance easier. Start with the strap—hand goes up through the loop—then add a light downhill touch just before turning.
Steps (HowTo)
-
Adjust loop and length
The strap should sit snugly around the wrist; the grip must feel natural with gloves on.
-
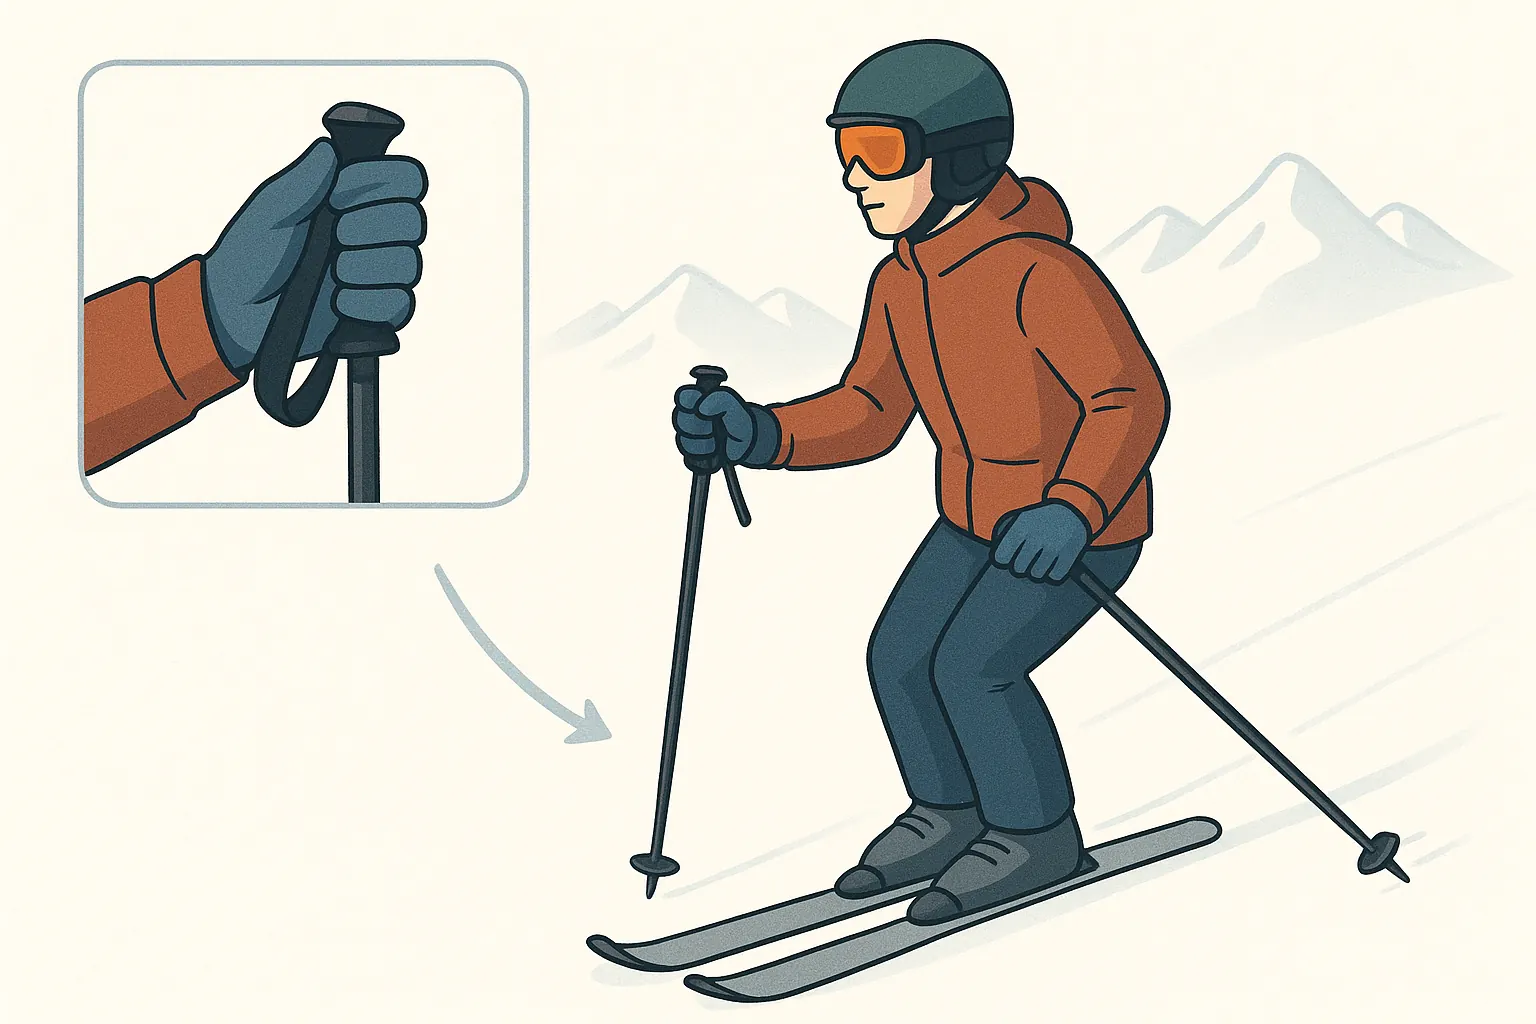
Hand through strap from below
Slide the hand up through the loop, then hold the grip over the strap. Weight rests on the strap, not on your fingers only.
-
Basic rhythm while moving
On flats: gentle left–right rhythm, tips slightly behind the boots; avoid planting too far forward.
-
Downhill touch before the turn
A short, soft touch downhill stabilizes the body and starts the turn without throwing the shoulders.
Typical Mistakes
- Threading the hand into the strap from above—no strap support.
- Planting far in front of the feet—pulls you backward.
- Leaning on poles too much—locks the knees and hurts balance.
- Tips pointing forward while walking—more chance to snag.
Beginner Questions
How tall should my poles be?
Flip the pole and hold below the basket—your forearm should be near 90°. Slightly shorter can feel easier for beginners.
Do I use poles in the wedge?
Only lightly. Focus on legs and edges; a gentle touch can help balance but avoid heavy support.
How do I avoid snagging the tip?
Keep the tip slightly behind the boot and plant close to the downhill ski with a quick, soft touch.
Instructor’s Tip
“Ski a minute without poles, then add one soft downhill touch before each turn. Small touch, big stability.”
Conclusion
With a correct strap, relaxed grip, and light touches, poles enhance rhythm and stability. Your turns become calmer and more controlled.