Introduction
Regular waxing and tidy edges restore speed and precision. Here’s a quick routine you can do at home or ask a shop to follow.
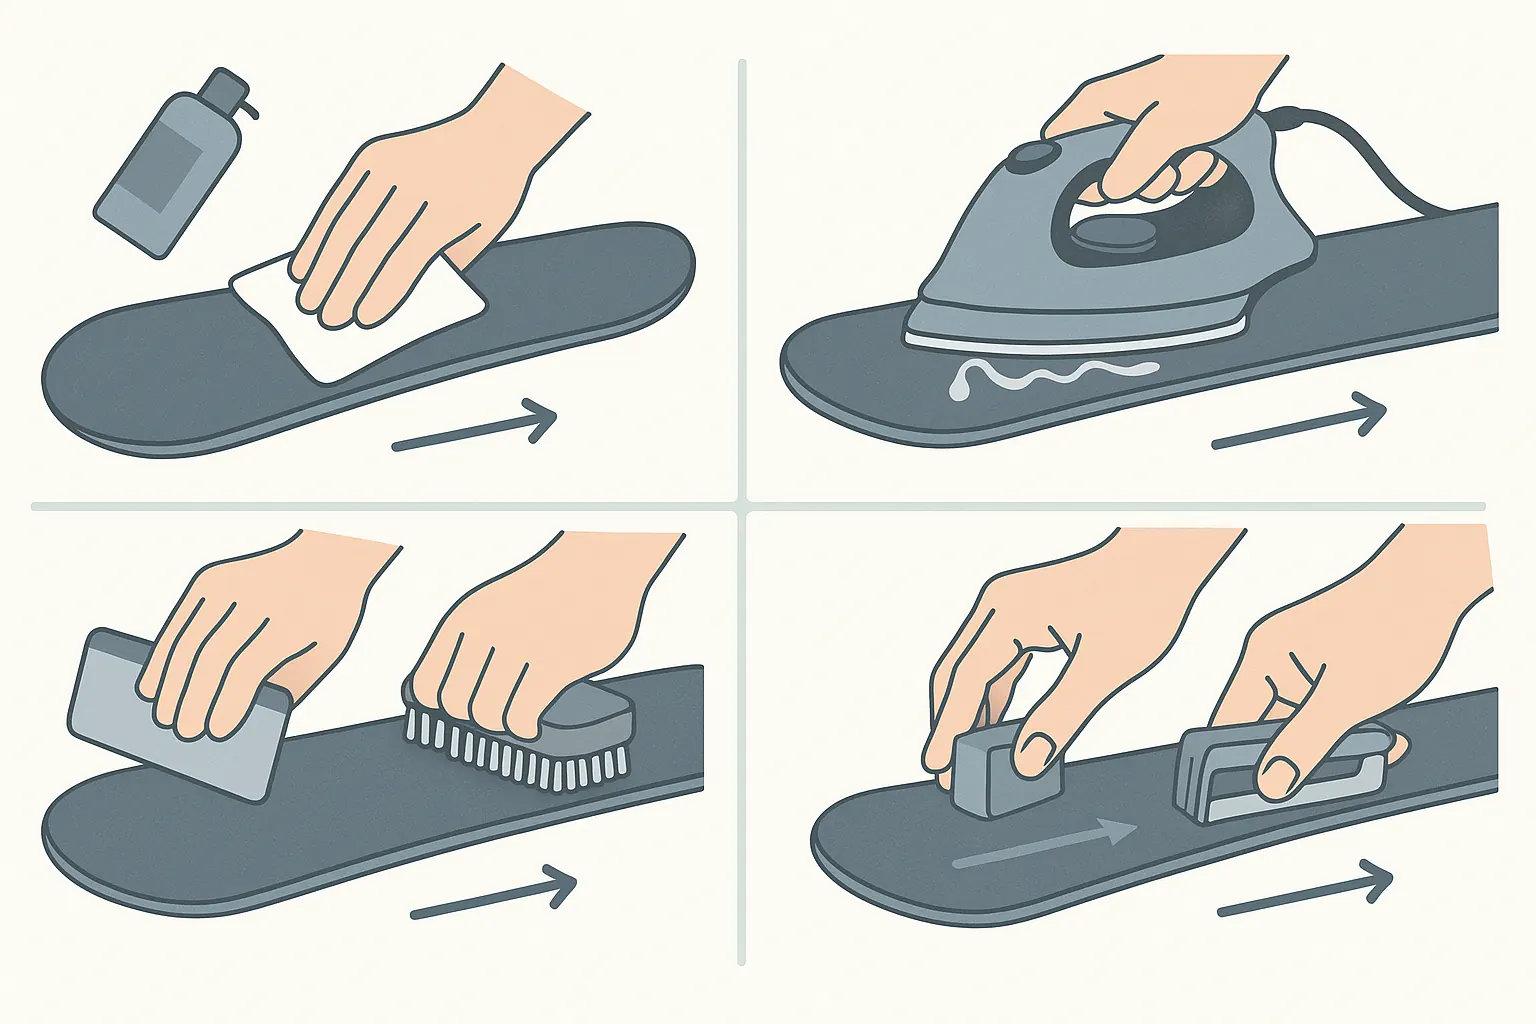
Steps (essence)
-
Clean and dry the base
Use base cleaner/cloth and let it dry. Remove grit and old wax clumps.
-
Apply and iron hot wax
Drip universal wax and keep the iron moving with no smoke. Let skis cool fully.
-
Scrape and brush
Plastic scraper from tip to tail; finish with nylon/horsehair brush for a smooth glide.
-
Deburr and lightly sharpen edges
Remove burrs with a gummy stone, then a few light passes in a guided tool tip-to-tail. Finish with a light gummy pass.
Typical mistakes
- Overheating the base (smoke) – oxidizes wax and dries the base.
- Scraping cross-grain – scratches the structure, slows the ski.
- Sharpening without a guide – inconsistent angle, catchy skis.
- Skipping the brush – leftover wax drags and feels sticky.
Beginner questions
How often should I wax?
When glide feels slow or about every 1–3 ski days; more often in cold, abrasive snow.
Can I burn the base with an iron?
Yes. Keep the iron moving and avoid smoke. If unsure, get a shop hot-wax.
Is rub-on wax useful?
Great for quick refresh; hot wax lasts longer and glides better.
Instructor’s tip
“Work tip-to-tail for every step—wax and edges. Consistent direction protects structure and keeps skis fast.”
Conclusion
A simple wax-and-edge routine brings back speed and safety. Five tidy steps can transform your day on snow.